Why connect Odoo with SmartPosti?
For businesses shipping parcels across Finland, Estonia, Latvia, and Lithuania, managing SmartPosti deliveries outside Odoo creates the same split-workflow problem that slows down every fulfilment team. Shipments need to be registered manually with SmartPosti after being confirmed in Odoo. Labels need to be generated in a separate portal and re-attached to delivery records by hand. Pickup points and parcel machine locations need to be looked up separately, with no connection to what is visible at checkout or on the delivery order. Tracking numbers sit in SmartPosti's system with no automatic way to reach the corresponding Odoo record.
The SmartPosti Shipping Integration by Creyox solves all of this with a purpose-built Odoo SmartPosti Connector that brings the complete SmartPosti logistics workflow into Odoo. Shipments are created directly from delivery orders, labels are generated automatically on validation, thousands of SmartPosti pickup places are synced into Odoo and selectable at checkout, and tracking numbers are attached to delivery records automatically with no manual steps and no portal switching required.
Overview
The Creyox SmartPosti Shipping Integration extends Odoo 17.0 with a full SmartPosti logistics sync layer, configured at the company level from Settings → Companies. Administrators enter their SmartPosti API credentials, configure default service settings, and verify the connection with a single test before going live. Both demo and production environments are supported, making it straightforward to validate the integration before activating it for live shipments. Community and Enterprise editions are both compatible.
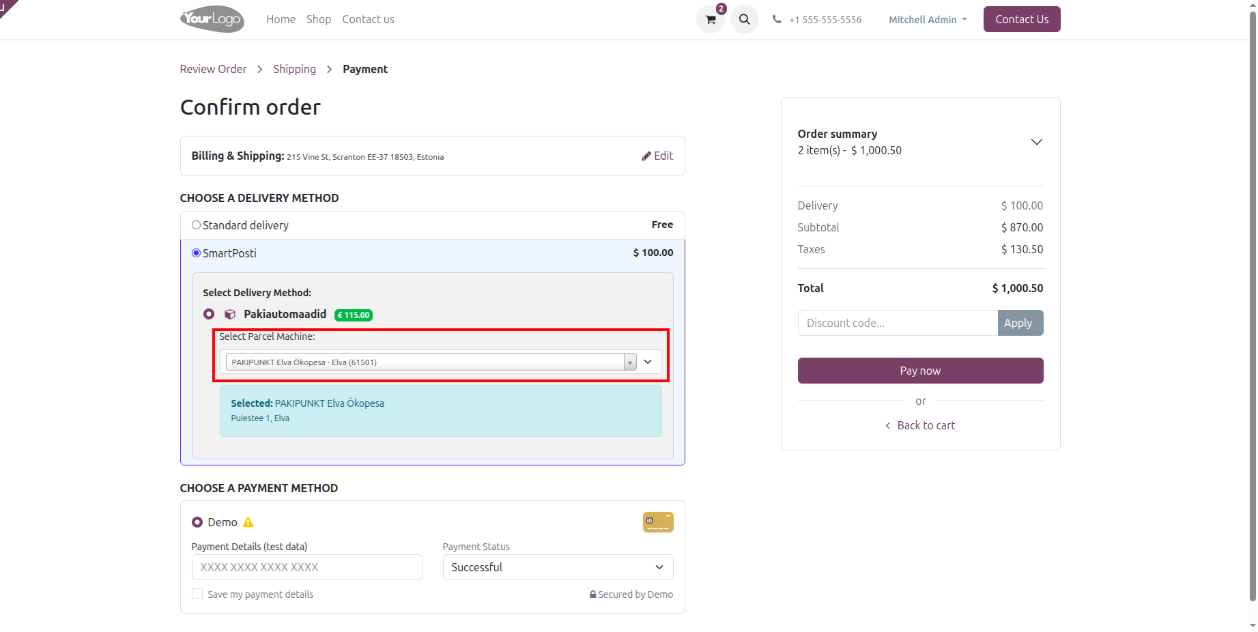
The core of this SmartPosti Logistics Sync is the pickup point infrastructure. The Sync Pickup Places button fetches all SmartPosti parcel terminal and pickup locations from the SmartPosti API into Odoo visible and searchable under Inventory → Configuration → Smartposti Places. These synced places appear as selectable options during website checkout, allowing customers to choose their preferred parcel machine or pickup point before placing an order, and are also selectable on the delivery order in the Odoo backend.
When a sales order containing a SmartPosti shipping method is confirmed and the delivery order is validated, the Odoo SmartPosti Connector automatically generates a PDF shipping label and assigns a tracking number to the delivery record both available immediately without any manual action. Country-based pricing can be configured per shipping method directly in the company SmartPosti Configuration page, with those prices displayed transparently to customers on the website checkout. Custom service names for Courier and Parcel Machine delivery options can also be configured, so the labels shown to customers at checkout reflect the business's own branding rather than default SmartPosti terminology.
Hot Features
◆ Automated Shipment Creation
◆ Real-time Label Generation
◆ Pickup Point Sync
◆ API-Based Integration
◆ Multiple Label Formats
◆ Quick API Key Setup
Features
◆ Automatically generate PDF shipping labels.
◆ Sync SmartPosti pickup points/places from API
◆ Test API connection before use
◆ Company-level configuration
◆ Create shipments directly from delivery orders
◆ Support for demo and production environments
◆ Support Community and Enterprise Editions
◆ Easy to use.
Work Flow Of SmartPosti
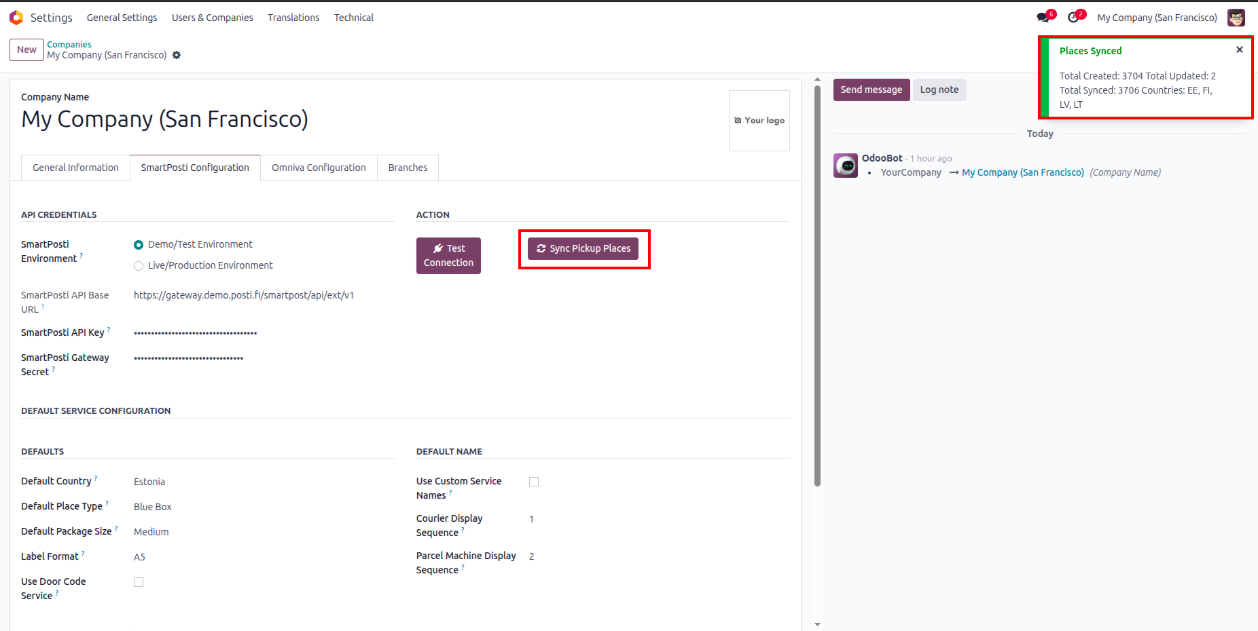
- Navigate to Settings >> Companies there user will find SmartPosti Configuration & Omniva Configuration.
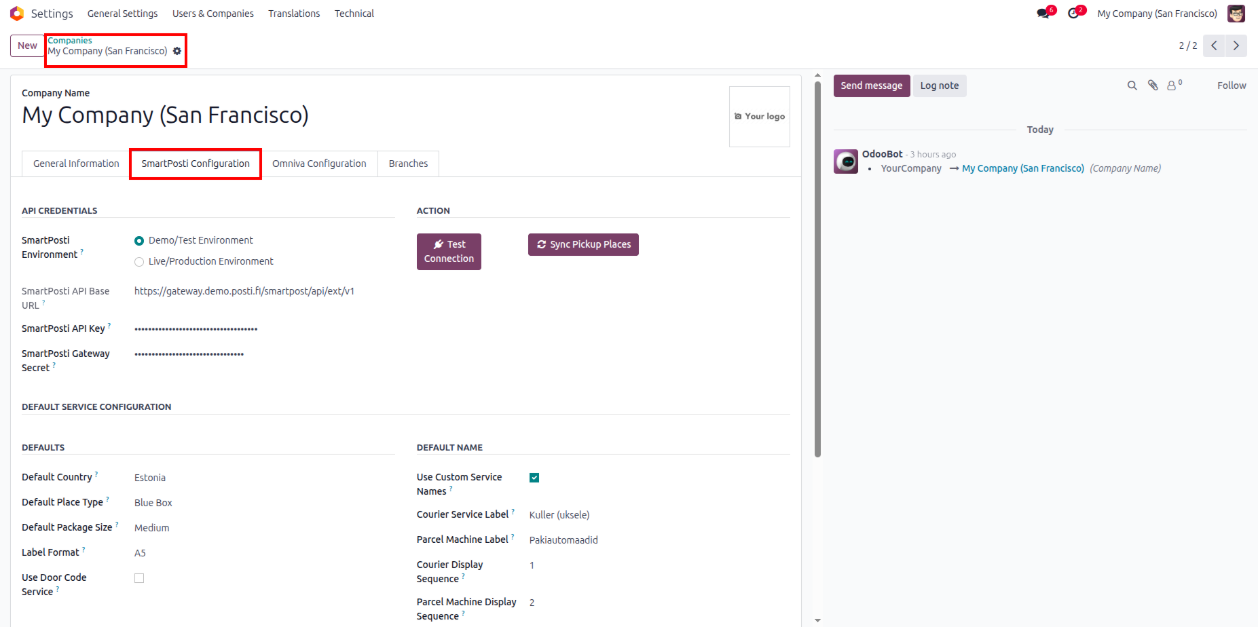
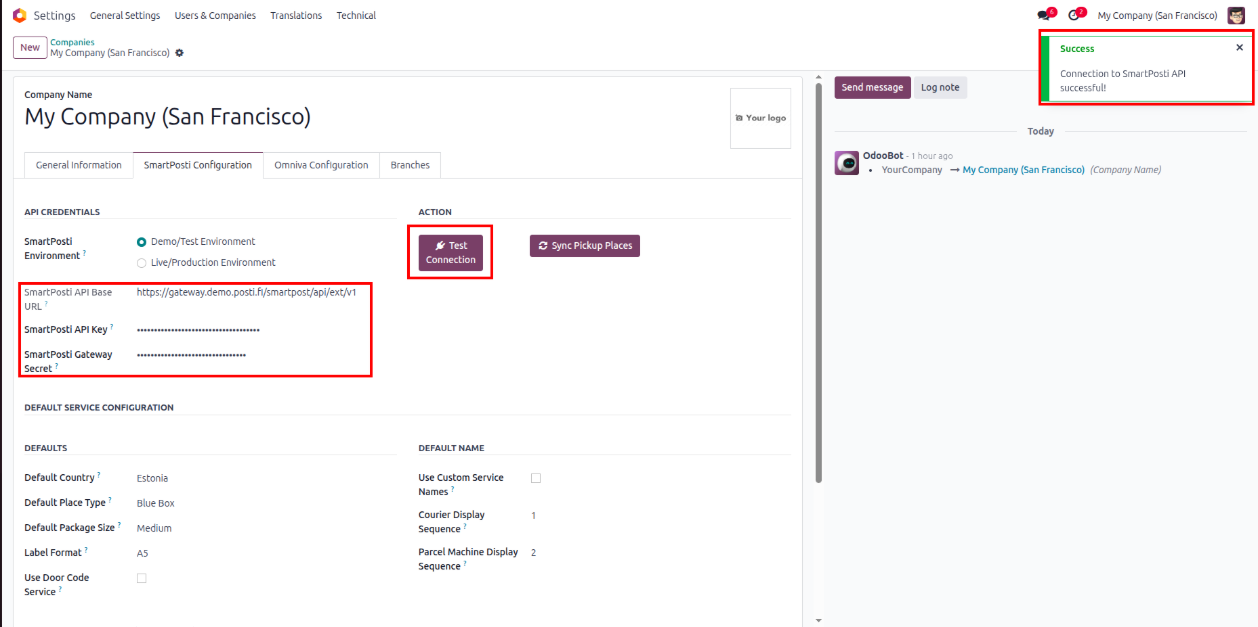
- Here after filling correct details click on Test Connection will show a notification message of success connection.
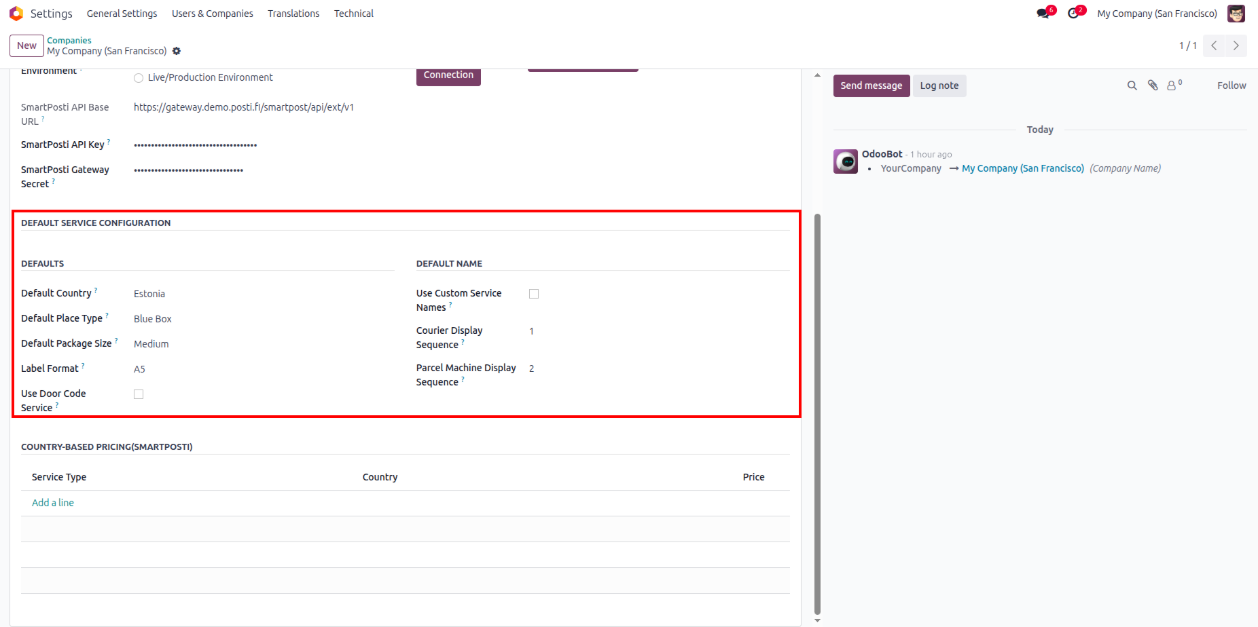
- With the generic configurations user can also do some other configurations from Default Service Configuration under page SmartPosti Configuration.
- By clicking on Sync Pickup Places button you will get the smartPosti places from smartPosti to odoo showing a success message notification.
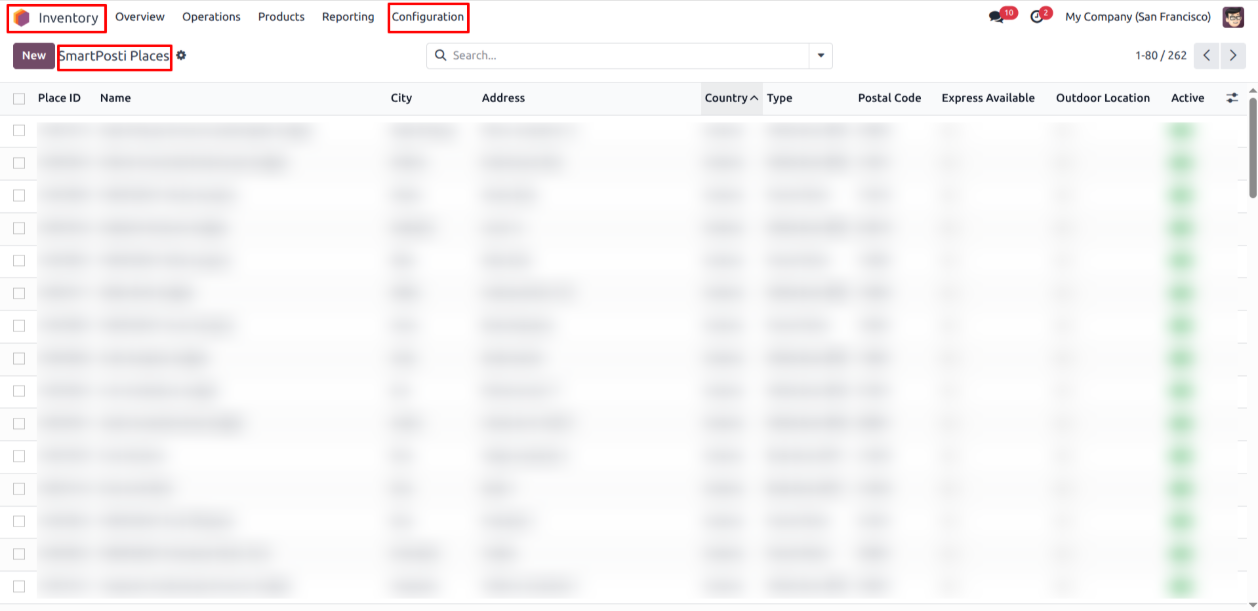
- Navigate to Inventory >> Configuration >> Smartposti Places there user will see all fetched smartposti places synced.
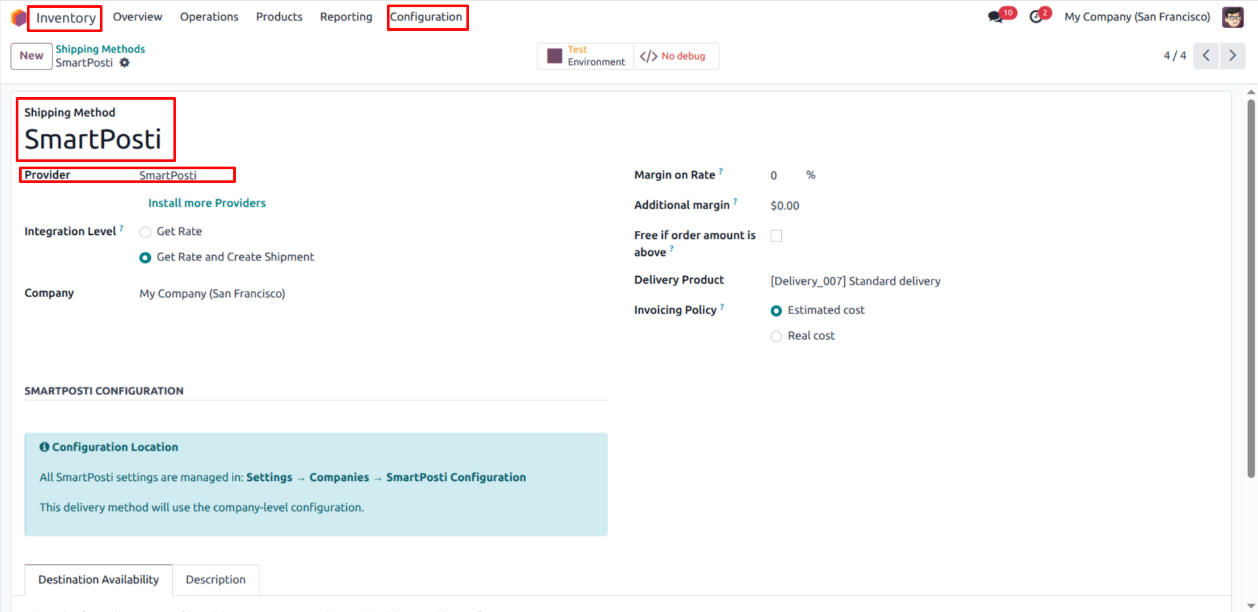
- After that go to Inventory >> Configuration >> Shipping methods
- Now it's time to create sales order with smartposti shipping.
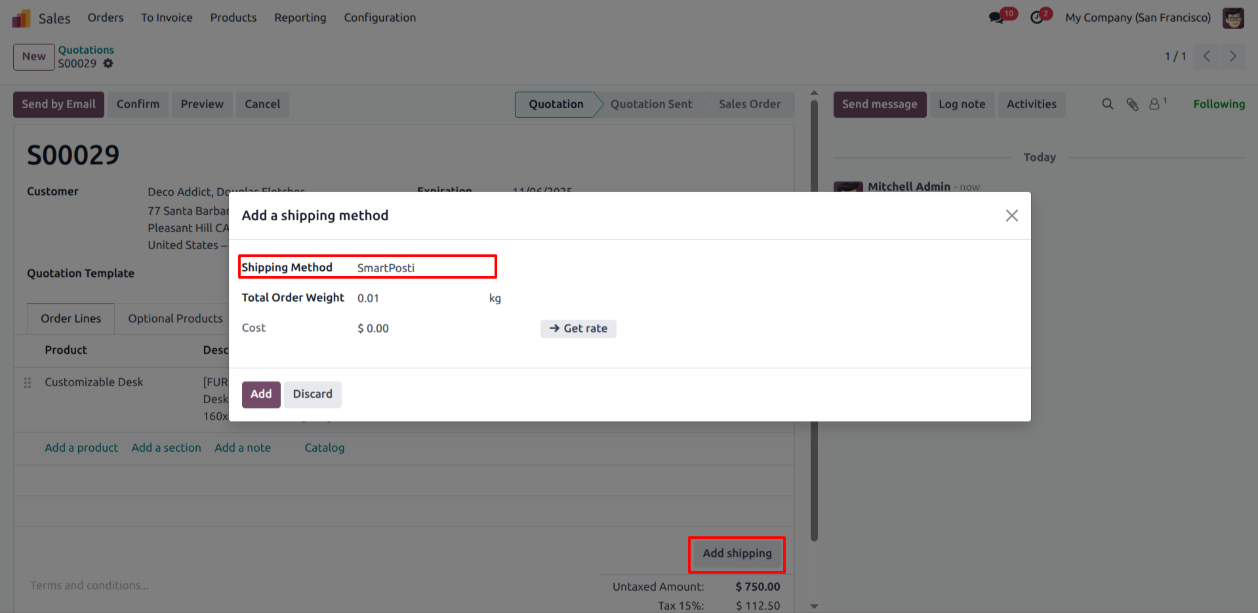
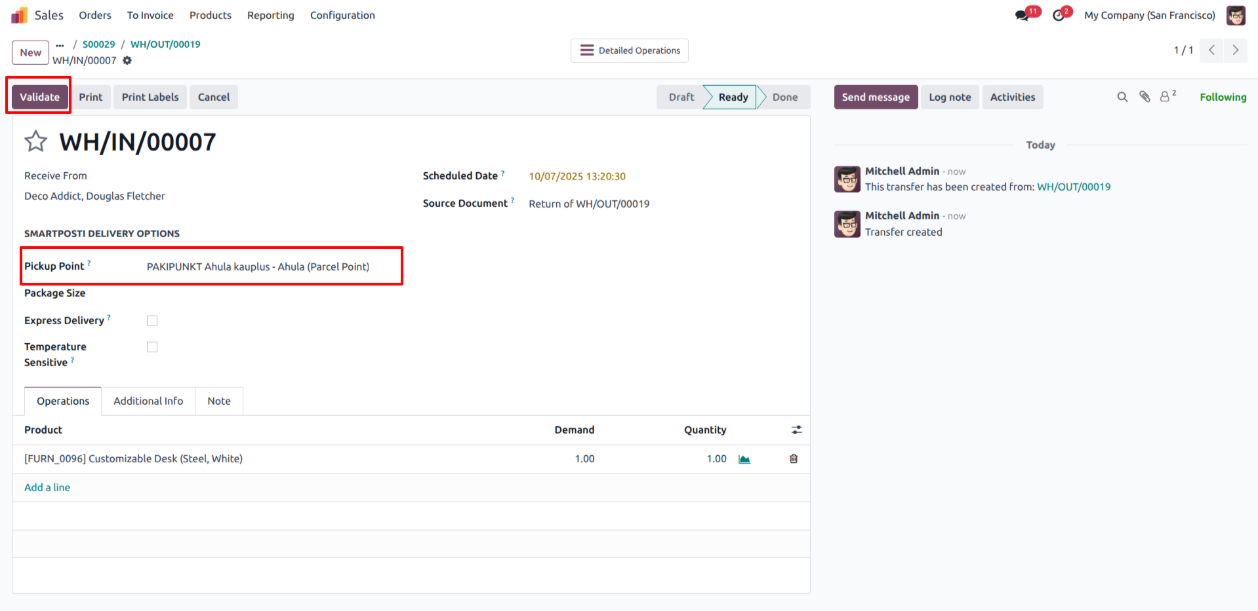
- After sales order confirmation, Now inside the Delivery Order select the Pickup Point and click Validate button.
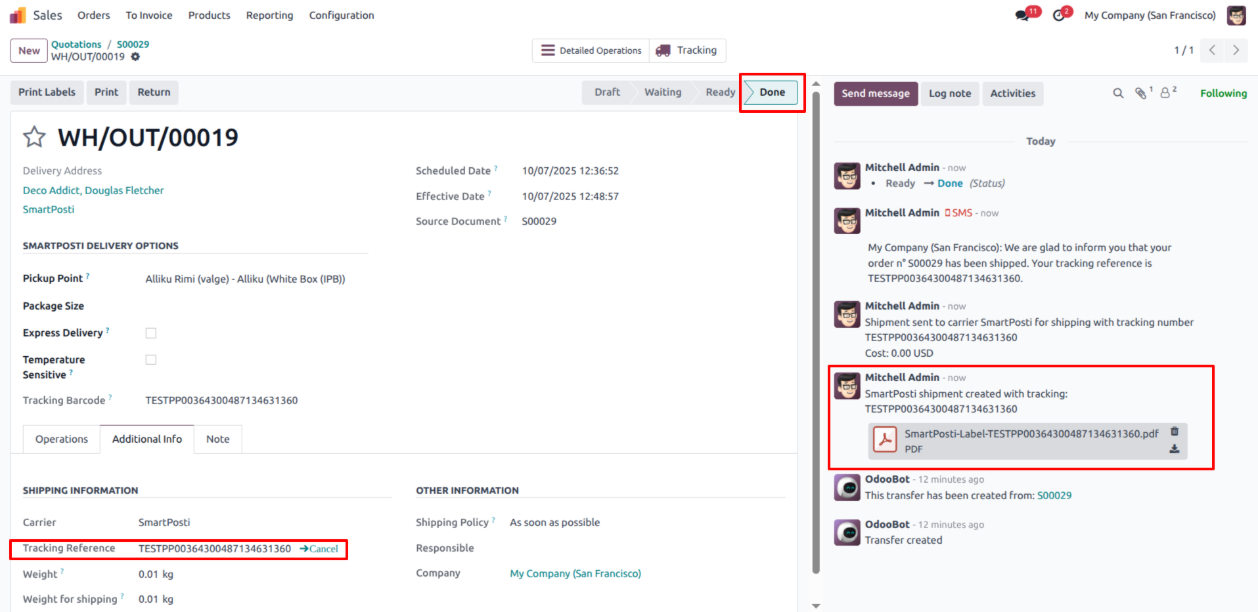
- Retrieve the Automatically generated Shipping Label and Tracking number in the delivery order.
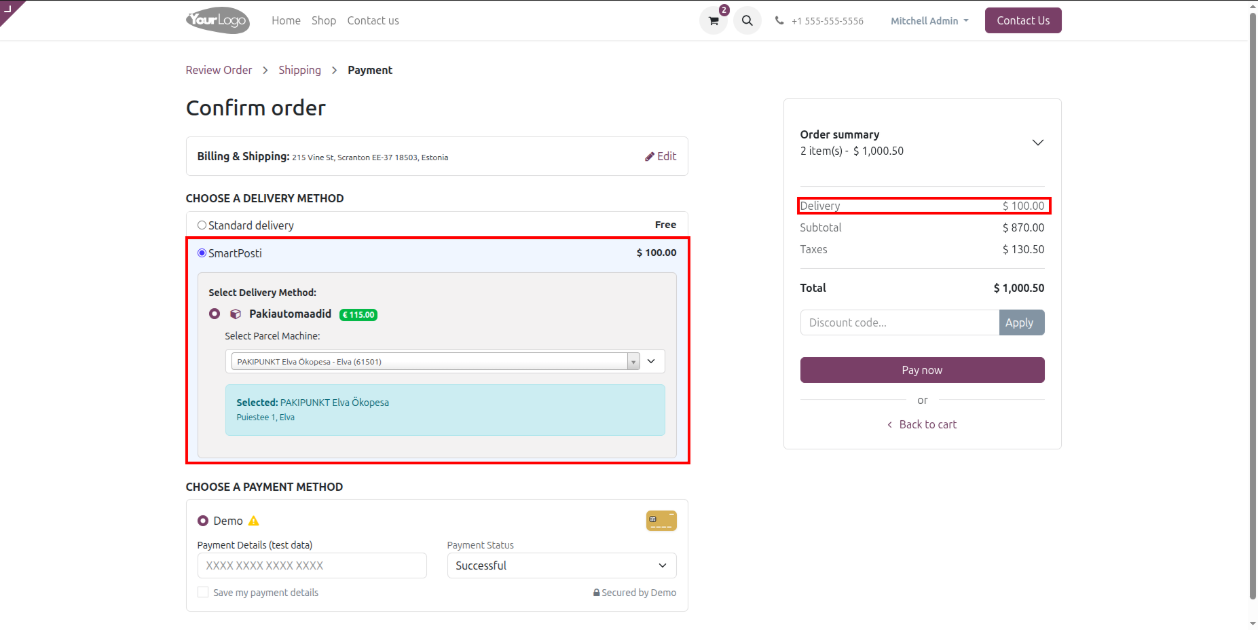
- Here user need to configure the pricing country wise under Country-Based Pricing(Smartposti) in the page SmartPosti Configuration inside company.

- These delivery prices will be directly visible in front side.
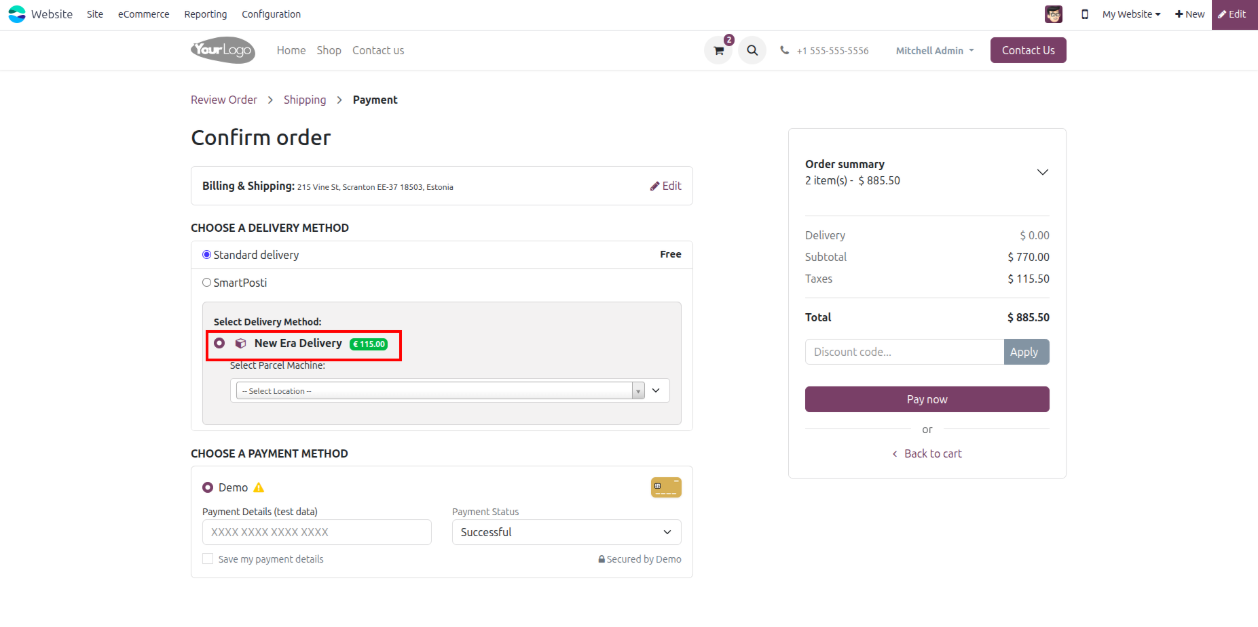
- Also, user will see fields Courier Service Label & Parcel Machine Label when enabled Use Custom Service Names under Default Name section of company page SmartPosti Configuration.

- Later if user change the field Parcel Machine Label with custom label as ex, New Era Delivery these same name will be shown into website checkout page.
- From here you can select the smartposti places which is already synced and available in the smartpost places accordingly.